Vendor Settings & Registration Config
These settings control how vendors join your marketplace, how many services they can create, and whether their services need your approval before going live. Find them at Sell Services > Settings > Vendors.
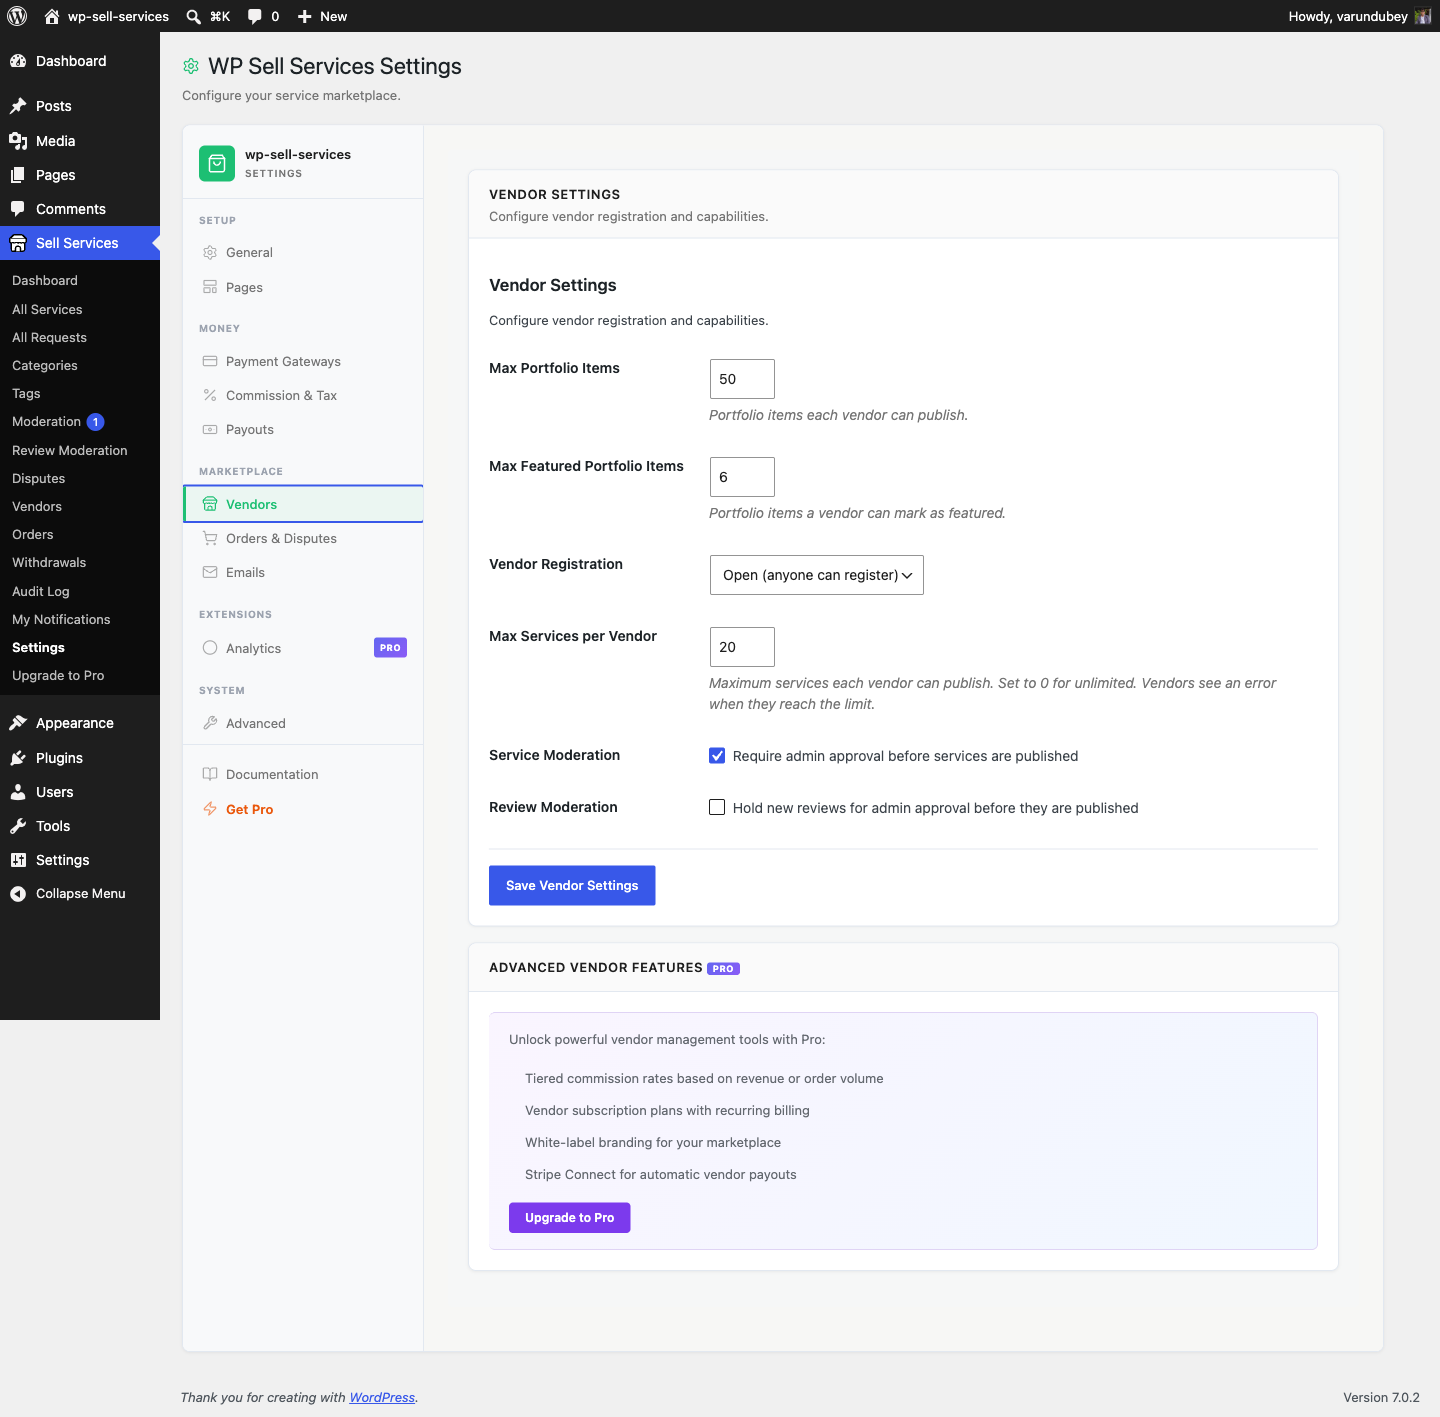
Vendor Registration Mode
Default: Open
Choose how vendors can join your marketplace:
| Mode | What Happens | Best For |
|---|---|---|
| Open | Anyone can register and start selling immediately | Growing marketplaces, community platforms |
| Requires Approval | Users submit applications; you approve or reject them | Curated marketplaces, quality control |
| Closed | Only you can create vendor accounts | Invite-only platforms, soft launches |
How Approval Works
When set to "Requires Approval":
- A user submits the vendor registration form.
- You receive a notification.
- Go to Sell Services > Vendors and filter by "Pending" status.
- Review the application and click Approve or Reject.
- The applicant gets an email with the result.
Try to respond within 24-48 hours. Slow approvals can discourage quality vendors from joining.
Manual Vendor Creation (Closed Mode)
When registration is closed, you create vendor accounts manually:
- Go to Users > Add New and create a WordPress user account.
- Assign the vendor role.
- The user can now access vendor features immediately.
Max Services Per Vendor
Default: 20
This limits how many active services each vendor can create. Set it to 0 for unlimited.
Keeping a reasonable limit encourages vendors to focus on quality over quantity. You can always increase it for top performers.
Require Verification
Default: Disabled
When enabled, new vendors start with "Pending" status and cannot create services until you verify their identity. You review their information and manually activate their account.
This adds an extra quality gate -- vendors must be verified before they can list anything on your marketplace.
Require Service Moderation
Default: Enabled
When enabled, every new service a vendor creates goes into "Pending Review" status instead of being published immediately. You review each service and approve or reject it.
To review pending services, go to Sell Services > Moderation — the queue carries a pending count in the menu. To browse everything else, go to Sell Services > All Services and filter by status.
This is useful for maintaining marketplace quality, especially in the early days. As you build trust with your top vendors, you might consider disabling this to speed things up.
Registration Form Fields
The vendor registration form collects:
- Display Name -- Their public vendor name.
- Tagline -- A professional one-liner.
- Bio -- Their background and experience.
- Skills -- Areas of expertise.
- Terms Agreement -- They must accept your marketplace terms.
Admin Vendor Management
From Sell Services > Vendors, you can manage all vendors on your marketplace:
- View Profiles -- See complete vendor information and statistics.
- Approve or Reject -- For pending applications.
- Suspend -- Temporarily disable a vendor's account.
- Delete -- Remove a vendor account entirely.
- Set Custom Commission -- Override the global commission rate for specific vendors.
Recommended Approaches
For a brand-new marketplace: Start with "Requires Approval" and "Require Service Moderation" both enabled. This lets you control quality as you build your initial vendor base. Once you have a solid group of trusted vendors, you can relax these settings.
For a growing marketplace: Switch to "Open" registration and disable service moderation to reduce friction. Use seller levels to naturally incentivize quality.
For a premium marketplace: Keep approval required but disable service moderation for Top Rated and Pro Seller vendors (the seller level system handles quality control at that point).